Table Of Contents
- Safety First: Essential Precautions Before You Begin
- Tools and Materials You'll Need
- Preparation: Assessing Your Ceiling and Electrical Setup
- Installing a Ceiling Fan on Standard Drywall Ceilings
- Installing a Ceiling Fan on Concrete Ceilings
- Installing a Ceiling Fan on Vaulted or Sloped Ceilings
- Wiring Your Ceiling Fan: Making Safe Electrical Connections
- Final Assembly and Testing
- Troubleshooting Common Installation Issues
- Choosing the Right Ceiling Fan for Your Space
Installing a ceiling fan can transform a room by improving air circulation, reducing energy costs, and adding both functionality and style to your space. While the project might seem intimidating at first, with proper preparation and the right guidance, most homeowners can successfully complete a ceiling fan installation in an afternoon. The key is understanding your specific ceiling type and following a systematic approach that prioritizes safety and precision.
Different ceiling types present unique challenges that require adapted installation techniques. Standard drywall ceilings offer the most straightforward installation, while concrete ceilings demand specialized hardware and drilling methods. Vaulted and sloped ceilings introduce angle considerations that affect both mounting hardware and fan performance. This comprehensive guide walks you through each scenario, ensuring you have the knowledge to tackle your specific installation with confidence.
Whether you're replacing an outdated ceiling fan, converting a standard light fixture, or installing in new construction, this step-by-step guide covers everything from safety precautions and tool selection to wiring methods and final testing. By the end, you'll understand how to properly support, wire, and secure your ceiling fan regardless of your ceiling configuration.
Safety First: Essential Precautions Before You Begin
Electrical work carries inherent risks, and ceiling fan installation combines electrical connections with overhead work that demands careful attention to safety protocols. Before you pick up a single tool, establishing proper safety measures will protect both you and your home's electrical system from potential hazards.
Turn off power at the breaker box, not just at the wall switch. A wall switch only interrupts one wire in the circuit, leaving other wires potentially energized. Locate the correct breaker that controls your installation area, flip it to the off position, and use a piece of tape and a note to prevent anyone from accidentally turning it back on while you work. After shutting off the breaker, test the existing fixture or outlet with a non-contact voltage tester to verify power is truly disconnected.
Working overhead requires stable footing and proper support. Use a sturdy stepladder rated for your weight plus the weight of tools and materials you'll be handling. Never stand on the top two steps of a ladder, and position it on level ground. Having a helper present is invaluable for ceiling fan installation, as fans can weigh 15-50 pounds depending on the model, making it difficult to hold the fan while making electrical connections single-handedly.
Wear safety glasses throughout the installation process to protect your eyes from falling debris, especially when drilling into ceilings or working with older fixtures that may release dust and particles. If you're working with concrete ceilings, eye protection becomes even more critical as concrete drilling produces fine dust and small fragments.
Tools and Materials You'll Need
Having the right tools ready before you begin will make your installation smoother and help you avoid mid-project trips to the hardware store. The specific tools you need may vary slightly based on your ceiling type, but this comprehensive list covers most installation scenarios.
Essential Tools:
- Non-contact voltage tester for verifying power is off
- Screwdrivers (both Phillips and flathead)
- Adjustable wrench or socket set for mounting hardware
- Wire strippers for preparing electrical connections
- Drill/driver with assorted bits
- Stepladder rated for adequate weight capacity
- Stud finder for locating ceiling joists
- Pencil for marking mounting locations
- Safety glasses and work gloves
Additional Tools for Specific Ceiling Types:
- Masonry drill bits and hammer drill for concrete ceilings
- Concrete anchors or expansion bolts rated for your fan's weight
- Ceiling fan-rated electrical box if replacing a standard light fixture box
- Angled mounting kit for vaulted or sloped ceilings
- Extension downrod for high ceilings (typically ceilings over 9 feet)
Electrical Supplies:
- Wire nuts for making secure electrical connections
- Electrical tape for additional connection security
- Cable clamps if running new wiring
Quality tools make a noticeable difference in installation ease and final results. While you don't need professional-grade equipment for a single installation, avoid the cheapest options that may strip screws, provide inaccurate readings, or fail mid-project.
Preparation: Assessing Your Ceiling and Electrical Setup
Proper assessment before installation prevents surprises and ensures you have everything needed to complete the job correctly. This preparation phase is where many DIYers save time by identifying potential challenges before they're hanging from a ladder with a heavy fan in hand.
First, determine whether you're replacing an existing ceiling fixture or installing in a location without previous wiring. If replacing an existing light fixture, examine the electrical box currently in place. Standard light fixture boxes are typically rated to support only 50 pounds and may not meet the structural requirements for a ceiling fan. Ceiling fans require a fan-rated electrical box specifically designed to handle the dynamic loads created by the rotating fan. These boxes are clearly marked as "fan rated" or "suitable for fan support."
Locate the ceiling joists in your installation area using a stud finder. Ceiling fans must be securely anchored to structural framing, not just drywall. In standard wood-frame construction, joists typically run 16 or 24 inches apart. Mark the joist locations with a pencil. If your desired fan location doesn't align with a joist, you'll need to install a fan-rated ceiling box with an expandable brace bar that spans between joists, or access the area from above to add blocking.
Measure your ceiling height to determine if you need a downrod extension. For optimal air circulation and safety, fan blades should be 7-9 feet above the floor and at least 10-12 inches below the ceiling. Standard flush mount installations work well for ceilings 8-9 feet high, while higher ceilings benefit from downrod extensions that bring the fan into the optimal performance zone.
Check your existing wiring configuration. Some installations have a single switch controlling one hot wire, suitable for fans without lights or fans where the light and motor run together. More versatile setups include two switches (one for the fan, one for the light) or a single switch with the fan controlled by a pull chain or remote. Understanding your current wiring helps you plan the appropriate connections.
Installing a Ceiling Fan on Standard Drywall Ceilings
Standard drywall ceilings in wood-framed homes represent the most common installation scenario. This straightforward process becomes even simpler when replacing an existing light fixture, as the electrical rough-in is already complete.
1. Remove the existing fixture. With power confirmed off at the breaker, remove the old light fixture by unscrewing the mounting hardware and carefully disconnecting the wires. Lower the fixture and set it aside. Examine the electrical box to verify it's fan-rated. If not, you'll need to replace it before proceeding.
2. Install or verify the fan-rated electrical box. If installing a new box, position a fan-rated ceiling box with an expandable brace bar through the existing fixture hole. Expand the bar until it contacts joists on both sides, then tighten according to manufacturer instructions until secure. The box should be flush with or slightly below the ceiling surface. If your existing box is already fan-rated and securely fastened to a joist, you can proceed to the next step.
3. Assemble the mounting bracket. Most ceiling fans include a mounting bracket that attaches to the electrical box. This bracket supports the fan during installation and provides the attachment point for the final installation. Secure the bracket to the electrical box using the provided screws, ensuring it's tightly fastened and level.
4. Attach the downrod to the fan motor. If using a downrod (for standard or tall ceilings), slide it through the canopy (the decorative cover that will hide the mounting hardware). Thread the fan wires through the downrod, then secure the downrod to the motor housing using the provided pin and clips. For flush mount installations on lower ceilings, skip this step and use the flush mount adapter included with your fan.
5. Hang the fan on the mounting bracket. Most modern ceiling fans feature a hook or slot system that allows you to temporarily hang the fan on the mounting bracket, freeing your hands for wiring. Lift the fan assembly (this is where a helper is valuable) and engage it with the mounting bracket's support hook. Ensure it's securely seated before releasing your full grip.
At this point, you're ready for the electrical connections, which we'll cover in detail in the wiring section below.
Installing a Ceiling Fan on Concrete Ceilings
Concrete ceilings are common in condominiums, apartments, and commercial spaces converted to residential use. While they provide excellent structural support for ceiling fans, they require specialized hardware and techniques different from standard drywall installations.
1. Mark your installation location. Determine the optimal fan placement considering room layout and furniture arrangement. Mark the center point where the fan will be installed. If replacing an existing fixture, you may use the existing location, though verify it's suitable for your room size and layout.
2. Drill pilot holes for anchors. Using a hammer drill with a masonry bit sized according to your anchor specifications (typically 3/8" or 1/2" for ceiling fan applications), drill holes into the concrete at your marked mounting points. Most ceiling fan mounting brackets require 2-4 anchor points. Drill to the depth specified by your anchor manufacturer, usually about 1/4 inch deeper than the anchor length to accommodate dust and debris.
3. Clean the holes and install anchors. Use a shop vacuum or blow out the drilled holes to remove concrete dust. Insert expansion anchors or wedge anchors rated for the combined weight of your fan plus a safety factor (typically the anchor should be rated for at least 3-4 times the fan weight). Tap anchors into place with a hammer until flush with the ceiling surface, then tighten according to manufacturer specifications.
4. Mount the ceiling plate. Attach the fan's ceiling mounting plate directly to the installed anchors using the appropriate bolts or screws. This plate serves the same function as the electrical box in drywall installations, providing the structural attachment point. Ensure the plate is level and all fasteners are fully tightened.
5. Address electrical wiring. Concrete ceiling installations often involve surface-mounted conduit or wiring that runs through the concrete structure. If electrical access already exists at your installation location, you can proceed with hanging the fan. If not, you'll need to either run surface conduit from an existing electrical source or consult an electrician to fish wiring through the concrete structure.
6. Hang and secure the fan. With the mounting plate securely anchored, attach the fan's mounting bracket and hang the fan assembly following the same procedures as a standard ceiling installation. The robust anchor system in concrete provides excellent support, often exceeding the strength of wood joist installations.
Concrete installations take more time due to the drilling requirements, but the resulting installation is exceptionally secure and stable.
Installing a Ceiling Fan on Vaulted or Sloped Ceilings
Vaulted and sloped ceilings add architectural interest but introduce angle considerations that affect both fan mounting and performance. Proper installation on angled ceilings requires specialized mounting hardware and attention to blade clearance.
1. Verify your fan is suitable for sloped installation. Not all ceiling fans can be safely installed on sloped ceilings. Check your fan's specifications to confirm it's rated for angled mounting. Most quality fans, including Amico's ceiling fans with lights, can accommodate slopes up to 15-30 degrees with the proper mounting kit.
2. Obtain an angled mounting kit. Standard mounting hardware positions the fan motor horizontally, which would leave it tilted on a sloped ceiling. An angled ceiling adapter or ball-and-socket mounting system allows the fan motor to hang vertically even when the ceiling slopes. These adapters typically accommodate slopes from 15 to 45 degrees.
3. Install the fan-rated electrical box. Follow the same procedures as standard ceiling installation for locating joists and installing a fan-rated electrical box. On sloped ceilings, pay extra attention to secure attachment, as the angled installation creates different load dynamics than a level ceiling.
4. Attach the angled mounting adapter. Install the slope adapter to the electrical box according to manufacturer instructions. These adapters usually feature an adjustable ball joint that allows you to set the angle. Adjust the adapter so the downrod will hang vertically when installed.
5. Use an extended downrod. Vaulted ceilings are typically higher than standard 8-foot ceilings, and the slope creates additional distance from the ceiling peak to the optimal fan blade height. Select a downrod length that positions fan blades 7-9 feet above the floor. For very high vaulted ceilings, you may need to special-order extended downrods ranging from 24 to 72 inches or more.
6. Assemble and hang the fan. Thread wiring through the downrod, attach the downrod to the motor housing, and hang the assembly from the angled mounting bracket. Adjust the ball joint if needed to ensure the fan hangs perfectly vertical. A small level placed on the motor housing can help verify proper alignment.
After installation, observe the fan during operation to ensure blades have adequate clearance from the sloped ceiling at all points in their rotation. Blades should maintain at least 10-12 inches from any ceiling surface.
Wiring Your Ceiling Fan: Making Safe Electrical Connections
Proper electrical connections are crucial for safe, reliable fan operation. Modern ceiling fans simplify wiring with color-coded wires and straightforward connection patterns, but understanding the basics ensures you make correct connections regardless of your specific fan model or home wiring configuration.
Before making any connections, verify once again that power is off using your non-contact voltage tester. Test both the black (hot) and white (neutral) wires from the ceiling to confirm no voltage is present.
Understanding Wire Colors and Functions:
- Black wire (hot): Carries electrical current from the switch to power the device
- White wire (neutral): Completes the circuit by returning current to the electrical panel
- Green or bare copper wire (ground): Provides a safety path for electricity in case of a fault
Standard Wiring Configurations:
Fan without light (three-wire connection): Connect the black wire from the ceiling to the black wire from the fan, the white ceiling wire to the white fan wire, and the ground wire from the ceiling (bare copper or green) to the green ground wire from the fan. This configuration powers only the fan motor.
Fan with light, single switch: Connect the black ceiling wire to the black wire from the fan. Connect white to white and ground to ground. Both the fan and light will be controlled by one wall switch, with separate control provided by pull chains or a remote control.
Making Connections with Wire Nuts:
Wire nuts are the standard method for making secure electrical connections in ceiling fan installations. These twist-on connectors create reliable joints that hold up well over time.
1. Strip the wires. Using wire strippers, remove approximately 3/4 inch of insulation from each wire end. Ensure you don't nick or cut the copper conductor, as this weakens the wire.
2. Twist and cap the wires. Hold the matching wires together (e.g., black to black) with their stripped ends aligned. Place a wire nut over the exposed ends and twist clockwise until the connection feels tight and secure. The wire nut should grip the insulated portion of the wires slightly, and no bare copper should be visible below the nut.
3. Verify the connection. Gently tug on each wire to confirm the wire nut is holding securely. A properly installed wire nut should not pull free or spin loosely. For added security, wrap electrical tape around the base of the wire nut where it meets the wire insulation.
4. Secure and organize wires. Once all connections are made, carefully tuck the wires and wire nuts into the electrical box. Avoid cramming or forcing wires, as this can loosen connections or damage insulation. Arrange wires neatly to allow room for the mounting hardware.
When installing ceiling fans with lights that also include multiple lighting options, such as the 42" low profile ceiling fan with 3-CCT dimmable capability, the wiring remains the same. The color temperature and dimming features are controlled by the remote or integrated controls rather than requiring separate wiring.
Final Assembly and Testing
With electrical connections complete and secure, you're ready to finish the installation and test your new ceiling fan. These final steps transform your work-in-progress into a fully functional fixture.
1. Secure the canopy. Slide the canopy (decorative cover) up against the ceiling, concealing the electrical box and wiring. Align the mounting screws with the slots in the canopy and rotate the canopy to lock it in place, or tighten the screws according to your fan's specific design. Ensure the canopy sits flush against the ceiling with no gaps.
2. Attach the fan blades. Most ceiling fans feature blade irons (mounting brackets) that attach to the motor housing. Align each blade iron with the mounting holes on the motor, insert the provided screws, and tighten securely. Install all blades, ensuring each is tight and properly seated. Some fans include pre-balanced blade sets; installing blades in the marked order helps maintain balance.
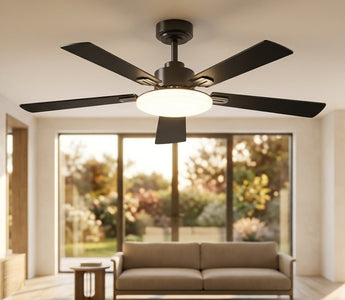
3. Install the light kit (if applicable). If your fan includes a light, connect the light kit wiring to the corresponding wires from the fan motor (typically a plug-and-socket connection for easy removal). Secure the light kit housing to the motor with the provided screws, then install light bulbs according to the manufacturer's specifications. Models like the 52" low profile ceiling fan from Amico feature integrated LED lighting with 50,000+ hour lifespans, eliminating the need for bulb replacement.
4. Restore power and test operation. Return to your breaker box and turn the power back on. Test each function systematically. Turn on the wall switch and verify the fan responds to controls (remote, pull chain, or wall switch depending on your configuration). Test all speed settings to ensure the fan operates smoothly at each level. If your fan includes a light, test it separately, including any dimming or color temperature adjustment features.
5. Check for wobbling or noise. Allow the fan to run for several minutes at each speed setting. Watch for excessive wobbling (slight movement is normal, but pronounced wobbling indicates an imbalance). Listen for unusual noises such as clicking, humming, or grinding sounds. Properly installed fans should operate quietly and smoothly.
6. Verify blade clearance. With the fan running, visually confirm that blades maintain safe clearance from walls, ceiling, and any light fixtures. Blades should have at least 18 inches of clearance from walls and other obstructions, and 10-12 inches below the ceiling.
Troubleshooting Common Installation Issues
Even with careful installation, you may encounter minor issues that require adjustment. These common problems have straightforward solutions that don't require removing and reinstalling the entire fan.
Fan Wobbles During Operation
Wobbling typically results from unbalanced blades or loose connections. First, tighten all blade mounting screws and the screws connecting the blade irons to the motor. If wobbling persists, check that all blades are at the same angle to the floor by measuring from ceiling to blade tip at several points around the fan. Most ceiling fans include a blade balancing kit with a clip-on weight; attach the weight to different blade positions to identify which blade needs balancing, then apply the adhesive weight according to instructions.
Fan Makes Noise During Operation
Clicking or rattling sounds often indicate loose screws in the blade assembly, light kit, or mounting hardware. With power off, methodically tighten all visible screws. Humming typically relates to electrical issues such as loose wire connections or incompatible dimmer switches (standard dimmer switches designed for lights can cause ceiling fan motors to hum; if you have a dimmer, it must be specifically rated for fan use).
Fan Doesn't Turn On
If your fan doesn't respond to controls, first verify that power is reaching the fan by confirming the circuit breaker is on and the wall switch is in the on position. Check that any pull chains are in the on position, as these override other controls. If you have a remote control model, replace the remote batteries. For hard-wired installations that still don't work, turn off the breaker and recheck all wire connections to ensure they're secure and properly connected.
Light Doesn't Work (But Fan Does)
When the fan operates but the light doesn't, first check that bulbs are properly installed and functional by testing them in another fixture. Verify that any separate light switch is turned on, and check that the light kit's pull chain (if present) is in the on position. For models with integrated LED lights, ensure the light kit is properly plugged into the motor housing connection.
Remote Control Doesn't Work
Replace the batteries first, as this resolves most remote issues. If the problem persists, verify that any dip switches in both the remote and the fan receiver are set to the same position (these prevent signal interference when multiple fans are present). Some remotes require syncing with the fan; consult your manual for the specific syncing procedure for your model.
Choosing the Right Ceiling Fan for Your Space
Selecting an appropriate ceiling fan before installation ensures optimal performance and aesthetic appeal. Several factors influence which fan style and size best suits your space.
Room Size and Fan Diameter
Fan diameter should correspond to room size for effective air circulation. For rooms up to 75 square feet, a 29-36 inch fan suffices. Rooms from 76-144 square feet work well with 36-42 inch fans. Spaces from 144-225 square feet benefit from 44-50 inch fans, while rooms up to 400 square feet require 50-54 inch fans. Very large spaces over 400 square feet may need multiple fans or commercial-grade models exceeding 54 inches.
Ceiling Height Considerations
Standard 8-9 foot ceilings accommodate flush mount or short downrod installations. Ceilings from 9-10 feet work well with 6-12 inch downrods. For each additional foot of ceiling height, add approximately 12 inches of downrod to maintain the optimal 7-9 foot height of blades above the floor.
Integrated Lighting Features
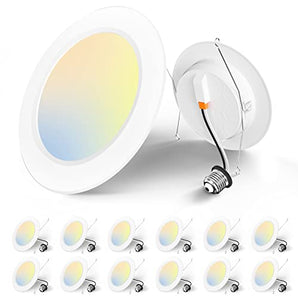
Ceiling fans with integrated lighting provide both air circulation and illumination, maximizing functionality while saving ceiling space. Modern designs feature LED technology that provides years of maintenance-free operation. Features like adjustable color temperature allow you to customize lighting from warm (2700K) to cool (5000K) depending on room function and time of day, while dimming capabilities offer complete control over lighting levels.
Quality ceiling fans combine efficient air movement with thoughtful design details. Amico's ceiling fans with lights feature ETL and FCC certifications for safety and performance, integrated LED modules with 50,000+ hour lifespans, CRI 80+ color rendering for accurate color representation, and reversible motor operation for year-round use (downdraft for cooling in summer, updraft for distributing warm air in winter). Models are available in both 42" and 52" diameters to suit various room sizes, with noiseless operation under 35dB for quiet performance in bedrooms and living spaces.
Control Options
Modern ceiling fans offer various control methods beyond traditional pull chains. Remote controls provide convenient operation without wall switches or pull chains, allowing speed and light adjustment from anywhere in the room. Wall control panels offer permanent control locations with integrated displays. Smart home compatible models connect to WiFi networks for voice control and smartphone operation, integrating with whole-home automation systems.
Style and Finish
Ceiling fans are available in styles ranging from traditional to ultra-modern. Consider your room's existing décor when selecting finish colors and blade materials. Common finishes include brushed nickel, oil-rubbed bronze, matte black, and matte white. Blade materials and colors affect both appearance and performance, with wood blades offering traditional aesthetics and engineered materials providing enhanced durability and moisture resistance for bathrooms or covered outdoor areas.
Installing a ceiling fan successfully requires understanding your specific ceiling type, following safety protocols, and making proper electrical connections. Whether you're working with standard drywall, concrete, or vaulted ceilings, the systematic approach outlined in this guide provides the knowledge needed to complete your installation with confidence.
Remember that every ceiling fan installation should prioritize structural security and electrical safety. Taking time to properly anchor your fan to structural framing, use fan-rated electrical boxes, and make reliable wire connections ensures years of trouble-free operation. While the project involves multiple steps, breaking the process into manageable phases makes ceiling fan installation an achievable DIY project for most homeowners.
The right ceiling fan enhances comfort, reduces energy costs, and adds visual appeal to your space. By combining proper installation techniques with a quality fan suited to your room size and ceiling configuration, you'll enjoy improved air circulation and lighting for years to come.
Ready to Install Your New Ceiling Fan?
Explore Amico's selection of ceiling fans with integrated LED lighting, featuring flush mount designs perfect for standard ceiling heights, remote control operation for convenient adjustment, 3-CCT dimmable lighting with CRI 80+ color accuracy, and whisper-quiet motors under 35dB. Every fan is backed by ETL and FCC certifications, includes a comprehensive warranty, and ships free anywhere. Whether you need a compact 42" model for bedrooms or a larger 52" fan for living spaces, Amico offers installer-friendly designs built for lasting performance.


