If you've ever torn into a ceiling during a remodel and discovered there's barely two inches of clearance between the drywall and the floor joists above, you already understand the problem with traditional recessed can lights. Those old metal housings demand four to six inches of depth, require fire-rated IC boxes in insulated ceilings, and take a full afternoon to rough-in. Canless LED recessed lights — sometimes called wafer lights or disk lights — eliminate every one of those pain points. They're ultra-thin, self-contained, and designed to slide into a simple cutout, making them the clear choice for virtually any remodeling project in 2026.
This guide covers everything you need to know before buying: how canless lights work, what size and color temperature to choose, how to avoid flickering dimmers, how to space your fixtures correctly, and how to install them in drywall or even older lath-and-plaster ceilings. Whether you're a first-time DIYer updating a single room or a contractor outfitting an entire house, you'll find the answers here.
Why Canless LED Recessed Lights Are the Remodeler's Best Friend
Traditional recessed lighting was never truly designed with remodeling in mind. The original can-and-trim systems were engineered for new construction, where you could drop a housing into open framing before the drywall ever went up. Retrofitting them into a finished ceiling meant cutting large holes, fishing wires through tight spaces, and sometimes discovering that the ceiling cavity simply wasn't deep enough to accommodate the housing at all. For anyone working in older homes — especially those built before the 1960s with lath-and-plaster ceilings — the challenge was even more daunting.
Canless LED recessed lights changed the equation entirely. Because the LED module, driver, and junction box are all integrated into a single ultra-thin assembly (typically less than an inch thick behind the ceiling surface), they require as little as 2 inches of clearance. There's no separate housing to mount, no bulb to replace, and no trim ring to install independently. The entire fixture goes in through the face of the ceiling, which means the only prep work required is cutting a clean hole and running a single wire to the junction box. Electricians who've made the switch routinely describe the difference as dramatic — fewer callbacks, faster installs, and cleaner-looking ceilings that homeowners love.
Beyond the installation advantage, canless LED fixtures deliver real long-term value. A quality unit rated at 50,000+ hours of lifespan will outlast multiple rounds of bulb replacements in a traditional fixture. Combined with lower wattage and higher lumen output, they cut energy bills noticeably — a meaningful benefit when you're replacing eight to twelve fixtures in a single room. Explore Amico's full lineup of recessed lighting to see how the canless category fits within a broader lighting plan.
How Canless (Wafer) Lights Actually Work
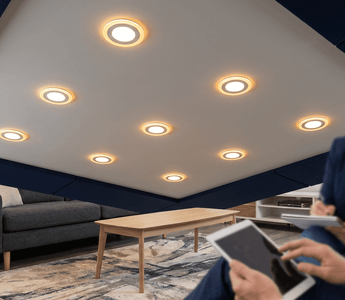
A canless recessed light is a fully integrated fixture: the LED chips, the thermal management layer, the driver (which converts AC power to the correct DC current for the LEDs), and the decorative trim face are all built into one cohesive unit. When you look up at a finished installation, you see only a flat, flush trim ring — nothing protrudes below the ceiling plane, and nothing is hidden behind a separate housing above.
The electrical connection is made inside a small junction box that mounts above the ceiling surface. Push-in wire connectors allow you to insert stripped wire ends into the connector ports until they click — no twisting required. This method is more reliable than traditional wire-nut connections and makes it straightforward to disconnect a fixture later if needed. Spring-loaded clips on the sides of the fixture body grip the ceiling material from above, pulling the trim ring tight against the surface for a seamless, gap-free look. The result is a cleaner ceiling profile than almost any other lighting type can achieve.
Key Factors to Consider Before You Buy
Selecting the right canless LED recessed light isn't complicated, but a few decisions made upfront will save you from returns, mismatched color tones, and frustrating dimmer behavior. Here's what actually matters.
Choosing the Right Size: 4-Inch vs. 6-Inch
The two most common sizes for residential remodeling are 4-inch and 6-inch, and the right choice depends primarily on ceiling height and room function rather than personal preference. As a general rule, 4-inch fixtures work best in rooms with 8-foot ceilings or lower, or in spaces where you want tighter, more focused accent lighting — think hallways, closets, or under-cabinet areas in a kitchen. Amico's 4-inch canless LED recessed lighting collection is a good starting point if you're working in one of those contexts.
For standard living rooms, kitchens, bedrooms, and open-plan spaces, 6-inch fixtures are usually the better fit. They produce more lumens per fixture, which means you can space them farther apart and use fewer of them to achieve the same light level. Amico's 6-inch recessed LED lighting options are among the most popular for whole-room remodeling projects for exactly this reason. When in doubt about scale, it helps to tape a 4-inch and a 6-inch circle on the ceiling and view them from across the room before committing to either size.
Color Temperature (CCT): Matching the Mood to the Room
Color temperature is measured in Kelvins (K), and it's one of the most overlooked decisions in a remodeling project. Get it wrong and your brand-new kitchen feels like a hospital waiting room, or your living room looks perpetually dingy. The scale runs from warm amber tones at 2700K up to cool, blue-white daylight at 5000K, with several useful stops in between. Amico's 5CCT fixtures let you select your preferred color temperature directly on the junction box using a toggle switch before installation — which means you're not locked in by your purchase decision and can fine-tune the look as you go.
For practical guidance: 2700K produces a warm, incandescent-like glow that works well in bedrooms, dining rooms, and living areas where you want a relaxed atmosphere. 3000K is slightly crisper and suits kitchens and bathrooms where you want warmth without sacrificing visibility. 4000K is a neutral white that works well in home offices, utility spaces, and garages. 5000K (daylight) is best for workshops, laundry rooms, or any space where task accuracy matters most. All Amico canless fixtures carry a CRI 80+ rating, meaning colors will render accurately enough for everyday living without the washed-out quality of lower-CRI alternatives.
Dimmer Compatibility: Stop the Flicker Before It Starts
Flickering is one of the most common complaints homeowners have after installing LED recessed lights, and it almost never originates from the fixture itself. The culprit is nearly always an incompatible dimmer switch — typically an older leading-edge dimmer designed for incandescent or halogen loads. LED fixtures draw far less current and behave differently under phase-cut dimming, which causes the electrical signal to become unstable at lower settings.
The solution is straightforward: pair your canless LEDs with a trailing-edge (ELV) or LED-rated dimmer from a reputable brand. Lutron's Maestro MSCL-OP153M and Diva DVCL-153P series are consistently verified for flicker-free performance with Amico fixtures. Leviton's SureSlide 6674 is another solid option. If you're planning a smart-home integration, the Lutron Caseta PD-6WCL works seamlessly. One important installation note: always check the minimum load rating on your dimmer. Some dimmers require a minimum of 25 to 40 watts to operate correctly — if you're running only two or three LED fixtures on a single circuit, you may need a different dimmer model or a dummy load resistor.
Certifications and Safety Ratings
For any product that connects directly to your home's electrical system, third-party safety certification is non-negotiable. Amico's canless recessed lights are ETL and FCC certified, which means they've been independently tested for electrical safety and electromagnetic interference compliance. ETL certification in particular is recognized by electrical inspectors and insurance companies across North America as equivalent to UL listing — important if you're remodeling in a jurisdiction that requires permits and inspections. Most Amico fixtures are also IC-rated (safe for direct contact with insulation) and airtight, which helps prevent conditioned air from leaking into the ceiling cavity.
How Many Lights Do You Need? Spacing & Placement Guide
Getting the fixture count right is as important as choosing the right product. Too few lights and you end up with dark pockets between fixtures; too many and the ceiling starts to look cluttered. A reliable starting formula for general ambient lighting is to divide your ceiling height by two to get the maximum spacing between fixtures. For an 8-foot ceiling, that means placing fixtures no more than 4 feet apart. For a 9-foot ceiling, you can stretch that to 4.5 feet.
For the distance from the wall, place fixtures roughly 18 to 24 inches from the perimeter. This prevents harsh shadows on the walls and gives the room a more balanced, even light. In kitchens, consider placing fixtures directly over your countertop work areas rather than relying solely on a center-of-room layout. If you're using gimbal recessed lights for artwork or accent walls, position them 24 to 36 inches from the wall and angle them at approximately 30 degrees toward the target surface.
For a practical example: a 12 x 16-foot living room with 9-foot ceilings would typically need six to eight 6-inch canless fixtures for comfortable general lighting, spaced approximately 4 feet apart in a grid pattern. Adding a secondary layer — dimmers, a ceiling fan with integrated lighting, or under-cabinet strips — gives you the flexibility to shift from task lighting to ambient mood lighting without changing a single fixture.
Step-by-Step Installation Guide
Canless LED recessed lights are genuinely one of the more beginner-friendly electrical upgrades you can tackle in a home remodel. As long as you're comfortable working with basic wiring and turning off breakers, the process is manageable. Here's how it goes from start to finish.
- Cut the power at the breaker. Never work on a live circuit. Use a non-contact voltage tester on the existing wiring before touching anything.
- Mark and cut your holes. Amico fixtures include a 1:1 paper template for accurate hole sizing. Use a drywall saw or hole-saw bit to cut cleanly. For lath-and-plaster ceilings, work slowly to avoid cracking the surrounding plaster.
- Run your wire to each location. For parallel wiring across multiple fixtures, each fixture connects independently back to the power source or to the junction box of an adjacent fixture — not in a continuous series loop. This ensures that if one fixture fails, all others continue to operate normally.
- Make the wire connections. Open the metal junction box on the fixture and insert the stripped wire ends into the push-in wire connectors: black (hot) to black, white (neutral) to white, and bare copper or green to ground. Insert each wire until you feel it click into place — no twisting required. This connection method is more reliable than traditional alternatives and holds up under vibration and thermal cycling.
- Set your color temperature. Before pushing the fixture into the ceiling, use the toggle switch on the junction box to select your CCT (2700K, 3000K, 3500K, 4000K, or 5000K). It's much easier to do this now than after installation.
- Secure the fixture. Fold the junction box above the ceiling line, connect it to the light head, then push the assembly into the hole. Extend the spring clips outward and upward — they'll grip the back of the ceiling material and pull the trim ring flush. Give it a gentle tug to confirm it's seated.
- Restore power and test. Turn the breaker back on, flip the switch, and verify the light comes on at full output and dims smoothly if you've installed a compatible dimmer.
Why Contractors Trust Amico for Large Projects
For professional electricians and contractors, the calculus on canless LED fixtures comes down to three things: installation speed, product reliability, and pricing on volume orders. Amico scores well on all three. The push-in wire connector system means the electrical connection on each fixture takes under a minute once the wire is pulled. The spring-clip retention system requires no separate mounting hardware, brackets, or trim rings. And because the fixture integrates everything into a single unit, there's no risk of mismatch between housing and trim — a surprisingly common source of callbacks on traditional recessed jobs.
Contractors who buy Amico fixtures in bulk for remodeling projects benefit from tiered volume discounts through the wholesale program, along with dedicated support for commercial and multi-unit residential jobs. Whether you're outfitting a single-family renovation or a full apartment building retrofit, the bulk pricing structure is designed to keep your materials cost competitive. Amico fixtures carry a 2 to 5-year warranty depending on the product line, and the 30-day hassle-free return policy gives both contractors and homeowners a genuine safety net. For larger commercial spaces, flat panel lights and high bay lights round out the offering for warehouses, workshops, and industrial environments.
Frequently Asked Questions
Can canless LED recessed lights be installed in insulated ceilings?
Yes, provided the fixture carries an IC (insulation contact) rating. Amico's canless wafer lights are IC-rated, meaning they can be in direct contact with attic insulation without posing a fire risk. They're also airtight-rated in many configurations, which helps reduce energy loss through the ceiling penetration — a meaningful benefit in climate-controlled homes.
Do canless recessed lights work in lath-and-plaster ceilings?
They do, and this is one of the biggest advantages over traditional can lights. Because the entire fixture assembly fits through a small face-cut hole and the spring clips grip the ceiling material from behind, you don't need access to the cavity above — ideal for plaster ceilings where fishing through is difficult. Cut carefully using a rotary tool or oscillating saw to avoid vibration cracking, and the installation process is otherwise identical to drywall.
Can I use canless LEDs to replace existing can lights?
This depends on whether your existing cans are recessed deeply enough that removing them would leave a hole larger than the new fixture's trim ring can cover. In most cases, you have two options: use a canless wafer light sized to cover the existing hole, or use a retrofit LED that's specifically designed to snap into the existing can housing using the old bulb socket for power. Retrofit kits are often the cleaner solution when the can housing is in good shape and you don't want to patch drywall.
How long do canless LED recessed lights last?
Amico's canless LED fixtures are rated at 50,000+ hours of lifespan. At 8 hours of daily use, that's over 17 years of continuous operation before the LEDs begin to show meaningful light output degradation. Because the LED module is integrated into the fixture rather than a replaceable bulb, there are no maintenance interruptions during that service life.
Are there canless recessed lights for outdoor use?
Standard canless wafer lights are rated for dry or damp indoor locations only and should not be used in fully exposed outdoor settings. For covered porches or soffits with some weather exposure, check that the fixture carries at least a damp-location rating. For fully outdoor applications, Amico's dedicated outdoor security light lineup is a better fit.
The Bottom Line
Canless LED recessed lights represent the most practical, efficient, and installer-friendly solution available for ceiling lighting in 2026 remodeling projects. They eliminate the clearance constraints that plagued traditional can lights, dramatically reduce installation time, and deliver superior energy performance over a 50,000+ hour lifespan — all without sacrificing the clean, built-in aesthetic that makes recessed lighting so desirable in the first place.
The key decisions — size, color temperature, dimmer compatibility, and spacing — are all approachable once you understand the fundamentals laid out in this guide. For most standard rooms, a 6-inch, 5CCT, ETL-certified fixture paired with a Lutron LED-compatible dimmer will cover virtually every scenario you'll encounter. For tighter spaces, accent lighting, or lower ceilings, Amico's 4-inch canless recessed lighting gives you the same quality in a more compact profile. Whichever direction your project takes, Amico's full recessed lighting collection is a reliable place to start — trusted by homeowners, endorsed by working electricians, and backed by a warranty and return policy that removes the risk from the purchase.
Planning a Larger Project?
Contractors and businesses can access tiered volume discounts, dedicated project support, and bulk pricing on Amico's full canless LED lineup. Get your custom wholesale quote today.
Request a Wholesale Quote


