Table Of Contents
- Can You Really Install Canless Recessed Lights Yourself?
- Why Canless Lights Are Easier Than Traditional Recessed Lighting
- Essential Skills and Tools You'll Need
- Critical Safety Checks Before You Start
- Step-by-Step Installation Guide for Canless Recessed Lights
- Wiring Multiple Fixtures: Parallel Connection Method
- Common DIY Mistakes and How to Avoid Them
- When You Should Call a Professional Instead
- Why Choose Amico for Your DIY Lighting Project
If you've been considering upgrading your home lighting but feel intimidated by electrical work, you're not alone. The good news? Installing canless LED recessed lights is one of the most approachable electrical projects for confident DIYers, and it's dramatically simpler than installing traditional recessed lighting with metal housings.
Modern canless recessed lights have revolutionized home lighting projects. Unlike the old-school can lights that required cutting large holes, maneuvering bulky metal housings into tight attic spaces, and complex trim installations, today's canless designs are slim, integrated units that install in minutes rather than hours. For homeowners comfortable with basic electrical work and following safety protocols, this is absolutely a manageable weekend project.
But "can you" and "should you" are different questions. This guide will help you honestly assess whether DIY installation is right for your situation, walk you through the complete process with professional-grade techniques, and show you exactly what makes Amico's recessed lighting ideal for DIY installation. Whether you're updating a single room or tackling a whole-house lighting refresh, you'll know exactly what to expect before you pick up a drill.
Can You Really Install Canless Recessed Lights Yourself?
Yes, most homeowners with basic electrical knowledge can successfully install canless recessed lights themselves. The determining factors aren't about the lights themselves—they're about your existing electrical setup, your comfort level working with electricity, and your local building codes. Canless LED fixtures are specifically engineered for easier installation compared to traditional recessed lighting, making them the go-to choice for DIY projects.
The installation difficulty largely depends on whether you're working with existing electrical boxes or running new wiring. If you have existing ceiling junction boxes from old fixtures, the project becomes significantly simpler—essentially replacing one light with another. Running entirely new circuits from your electrical panel is more complex and often requires permit applications and inspections. Most DIY installations fall somewhere in between: tapping into existing ceiling wiring to add new fixture locations.
Your local electrical codes play a crucial role in whether you should tackle this yourself. Some jurisdictions require licensed electricians for any ceiling electrical work, while others permit homeowner installations with proper permits and inspections. Before purchasing materials, contact your local building department to understand permit requirements. This isn't just bureaucratic red tape—it ensures your work meets safety standards and won't complicate future home sales or insurance claims.
From a skill perspective, you need three core competencies: understanding basic electrical safety (identifying circuits, using a voltage tester, working with power off), comfort working on ladders and in confined spaces, and ability to follow detailed instructions precisely. If you've successfully replaced light fixtures, installed ceiling fans, or completed similar electrical projects, canless recessed light installation is within your capability range.
Why Canless Lights Are Easier Than Traditional Recessed Lighting
The difference between installing canless lights and traditional can lights is night and day. Traditional recessed lighting requires cutting 6-8 inch holes in your ceiling, wrestling heavy metal housings through the opening, securing them to ceiling joists, making electrical connections inside cramped housing boxes, and then installing separate trim pieces. The process is time-consuming, physically awkward, and leaves significant room for installation errors.
Canless LED recessed lights eliminate most of these complications through integrated design. The entire fixture—LED module, driver, and trim—is built as one slim unit, typically just 1-2 inches thick. You cut a much smaller hole (usually 3-4 inches for 4-inch canless LED recessed lighting or 5-6 inches for 6-inch recessed LED lighting), make your electrical connections with accessible junction box pigtails, and secure the fixture with integrated spring clips. What used to take 45-60 minutes per fixture now takes 15-20 minutes.
The weight difference alone makes canless installation more manageable. Traditional metal housings weigh 3-5 pounds and require two hands to position while making connections. Canless fixtures weigh under a pound in most cases, allowing you to easily hold the fixture with one hand while working with the other. This is especially valuable when working from a ladder or in tight attic spaces.
Modern canless designs also solve the insulation-contact problem that complicates traditional installations. Older recessed housings often require specific IC-rated (insulation contact) versions and careful insulation management to prevent fire hazards. Quality canless LED fixtures like those from Amico are designed with integrated thermal management that allows direct insulation contact without safety concerns, simplifying installation in insulated ceiling spaces.
Essential Skills and Tools You'll Need
Before starting your canless recessed lighting project, ensure you have both the technical skills and proper tools. Attempting electrical work without adequate preparation creates safety hazards and often results in code violations that require expensive corrections. An honest skills assessment now saves time, money, and potential injury later.
Required Skills for DIY Installation
- Electrical safety fundamentals: You must understand how to safely shut off power at the breaker, verify circuits are de-energized with a voltage tester, and recognize proper wire colors and functions (black/hot, white/neutral, green or bare/ground)
- Basic wiring techniques: Stripping wire insulation to proper lengths, making secure connections with push-in wire connectors, and understanding parallel wiring methods for multiple fixtures
- Ceiling access navigation: Comfort working in attic spaces if applicable, or ability to fish wire through finished ceilings when adding new fixture locations
- Precision measuring and cutting: Accurately marking fixture locations and cutting clean holes in drywall without damaging surrounding areas
- Problem-solving abilities: Troubleshooting unexpected issues like hidden obstacles, incorrect existing wiring, or structural complications
Tools and Materials Checklist
Essential tools:
- Non-contact voltage tester (absolute must-have for safety verification)
- Hole saw appropriate for your fixture size (typically 3.75" or 5.75" for Amico canless lights)
- Drill with adequate power for ceiling cutting
- Wire strippers rated for 12-14 gauge wire
- Measuring tape and pencil for marking locations
- Stable ladder tall enough to comfortably reach ceiling
- Headlamp or work light for visibility
- Stud finder to locate ceiling joists
Electrical materials:
- Canless LED recessed lights (calculate needed quantity based on room size and layout)
- 14/2 or 12/2 NM-B electrical cable if running new wiring
- Push-in wire connectors (typically provided with quality fixtures)
- Junction boxes if required by your installation method
- Cable clamps and staples for securing wiring
Don't compromise on tool quality, especially for safety equipment. A reliable non-contact voltage tester is your primary protection against electrical shock. Similarly, using the correct size hole saw ensures clean cuts that your fixture trim will properly cover. Attempting to "make do" with inadequate tools typically creates more problems than it solves.
Critical Safety Checks Before You Start
Electrical work demands respect. Every year, improper DIY electrical installations cause house fires, property damage, and serious injuries. Following proper safety protocols isn't optional—it's the difference between a successful project and a dangerous situation. Before touching any wires, complete these essential safety steps.
Power isolation and verification is your first priority. Locate the circuit breaker controlling your work area and switch it to the OFF position. Don't rely on wall switches alone—they only interrupt the hot wire, leaving neutral and ground wires potentially energized. After shutting off the breaker, test the circuit with your non-contact voltage tester at multiple points to confirm power is completely off. Test an outlet or existing fixture on the same circuit, then test again at your specific work location. This two-step verification catches situations where circuits are mislabeled or wired unexpectedly.
Check for hidden obstacles before cutting ceiling holes. Use a stud finder to locate ceiling joists and mark their positions. Your canless fixtures need to install between joists with adequate clearance. Also probe carefully with a small finish nail to check for hidden electrical cables, plumbing pipes, or HVAC ducts that might run through your planned fixture locations. Finding these obstacles before cutting large holes saves significant drywall repair work.
Assess your attic or ceiling cavity conditions if you'll be accessing above the ceiling. Check for adequate insulation clearance, verify you have safe footing or adequate blocking to work from, and ensure proper ventilation if working in hot attic spaces. Heat exhaustion in attics causes more DIY injuries than many people realize. Plan your work for cooler parts of the day and take regular breaks if working in high-temperature environments.
Finally, review your local electrical codes and permit requirements. Some jurisdictions require permits for adding new lighting circuits or even for replacing existing fixtures. Making required permit applications before starting work is much easier than dealing with code violations discovered during home inspections when selling your property. Most building departments offer helpful guidance for homeowner DIY projects and can clarify what's allowed in your area.
Step-by-Step Installation Guide for Canless Recessed Lights
Once you've completed your safety checks and gathered materials, the actual installation process is straightforward. These steps assume you're working with existing ceiling wiring and installing new fixture locations by tapping into accessible electrical boxes. The process for Amico recessed lighting is designed specifically for ease of installation, with features that simplify each step.
1. Plan your fixture layout carefully – Proper spacing makes the difference between professional-looking results and obvious mistakes. For general room lighting, space fixtures 4-6 feet apart and position them 2-3 feet from walls. In kitchens, place fixtures 18-24 inches from cabinet fronts to minimize shadows on countertops. Mark each location with a pencil, double-checking measurements before cutting. Remember that correcting poorly positioned holes requires significant drywall repair.
2. Cut your ceiling holes precisely – Using the appropriate hole saw for your fixture size (check manufacturer specifications), cut slowly and steadily through the drywall. Support the cutout piece as you complete the cut to prevent it from falling and damaging anything below. Cut cleanly without wobbling the saw, as ragged edges are difficult to hide. If you encounter unexpected obstructions, stop immediately and reassess the location rather than forcing the cut.
3. Run electrical cable to new fixture locations – If adding fixtures beyond existing wiring, carefully route 14/2 NM-B cable from your power source to each new location. Secure cables to ceiling joists with appropriate staples at required intervals (typically every 4.5 feet). Leave approximately 12-16 inches of cable extending through each hole for connection work. When fishing wire through finished ceilings, work carefully to avoid damaging insulation or snagging on obstructions.
4. Prepare wires for connection – Strip approximately 6 inches of outer sheathing from your electrical cable, exposing the individual black (hot), white (neutral), and bare copper (ground) wires. Then strip about 1/2 inch of insulation from the black and white wires. The ground wire typically doesn't require additional stripping. Clean, properly stripped wires ensure reliable connections and reduce the risk of loose connections that could cause arcing or overheating.
5. Make electrical connections with push-in wire connectors – Amico's fixtures include push-in wire connectors that dramatically simplify this step compared to traditional wire nuts. Insert the black (hot) wire from your electrical cable into the connector port with the black fixture wire until it clicks securely. Repeat for the white (neutral) wires. Then connect the bare ground wire to the fixture's ground wire or grounding screw. These push-in connectors create more reliable connections than traditional alternatives because they maintain consistent contact pressure and can't loosen over time.
6. Tuck wiring into the ceiling cavity neatly – Gently fold the connected wires accordion-style and push them into the ceiling cavity, ensuring no wires are pinched or stressed. Proper wire management prevents damage to connections and ensures adequate clearance for the fixture body. Don't force wires into impossibly tight spaces—if wiring barely fits, you may need a different fixture style or junction box approach.
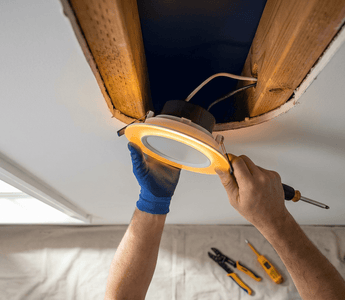
7. Insert and secure the canless fixture – Hold the fixture at an angle and guide it through the ceiling hole. The integrated spring clips will compress as you push the fixture into place. Once fully inserted, these clips automatically expand against the back of the drywall, securing the fixture firmly. Press around the fixture perimeter to ensure even contact and proper trim appearance. Quality fixtures like Amico's 4-inch canless LED recessed lighting include robust clips that hold securely without requiring additional hardware.
8. Restore power and test your installation – After all fixtures are installed, return to your electrical panel and switch the breaker back to the ON position. Test each fixture with the wall switch. If any fixture doesn't illuminate, immediately turn the breaker off and check that fixture's connections. Never attempt to adjust connections with power on. Proper functioning on first test indicates correct installation and gives you confidence in your work quality.
Wiring Multiple Fixtures: Parallel Connection Method
When installing several recessed lights on the same switch, proper wiring configuration ensures reliable operation and safety. The correct method is parallel connection, where each fixture receives power through its own dedicated connection to the circuit, rather than passing power sequentially from one fixture to the next.
In a parallel configuration, you'll run your main power cable from the switch to your first fixture location, then run separate cables from that junction point to each additional fixture. This can be accomplished by installing a junction box at a central location and running individual cables to each fixture, or by running continuous cable that you tap at each fixture location. The key characteristic is that each fixture receives the full circuit voltage independently.
This wiring method offers significant advantages over sequential wiring approaches. If one fixture fails or develops a connection problem, the other fixtures continue operating normally. The parallel method also distributes electrical load more evenly, reducing voltage drop issues that can occur with long sequential runs. Additionally, parallel connections are much easier to troubleshoot because each fixture can be isolated and tested independently.
When making connections at each fixture location, you'll typically have three wires in the box: the incoming power cable, the outgoing cable to the next fixture (except at the last fixture), and the fixture's connection pigtail. Use push-in wire connectors to join all hot wires together (typically black), all neutral wires together (typically white), and all ground wires together (bare copper or green). The organized, reliable connections provided by quality push-in connectors make managing these multi-wire junction points straightforward and secure.
Common DIY Mistakes and How to Avoid Them
Even straightforward projects can go wrong when installers skip important steps or make incorrect assumptions. Learning from common mistakes helps you avoid frustrating problems and ensures your installation looks professional and functions reliably for years.
Poor fixture spacing and placement ranks among the most visible mistakes. Recessed lights installed too close together create overlapping bright spots with dark gaps between, while fixtures spaced too far apart leave dim areas. Many DIYers also position fixtures too close to walls or fail to account for ceiling obstructions like beams or ceiling fans. Before cutting any holes, create a detailed layout plan accounting for room dimensions, furniture placement, and functional lighting needs. Use painter's tape on the ceiling to visualize fixture positions and adjust as needed before committing to permanent holes.
Inadequate hole preparation causes installation difficulties and appearance problems. Cutting holes too large for your fixtures leaves visible gaps around trim rings that look unprofessional. Conversely, holes cut too small require enlarging, risking ragged edges or cracked drywall. Always verify the exact hole size specification for your specific fixture model—don't assume all recessed lights use the same dimensions. Use a sharp hole saw appropriate for your fixture and cut steadily without forcing the tool.
Incorrect wire connections represent serious safety hazards. Reversing hot and neutral wires, failing to properly secure ground connections, or using inadequate connector types creates shock risks and potential fire hazards. Always match wire colors correctly (black to black, white to white, ground to ground), ensure each connection is mechanically secure by tugging gently after connecting, and never wrap wires together without proper connectors. Quality push-in wire connectors eliminate most connection mistakes by clearly indicating proper insertion and providing secure mechanical connection without requiring technique-dependent twisting.
Ignoring thermal and insulation considerations can cause premature fixture failure or create fire hazards. While modern canless LED fixtures like Amico's products are designed with integrated thermal management, they still need adequate ventilation. Don't pack insulation directly against fixtures unless they're specifically rated for insulation contact. Ensure adequate attic ventilation above fixtures, and avoid installing recessed lights where they'll be covered by storage boxes or other items that restrict airflow.
Skipping the testing phase before closing everything up causes frustration when problems emerge later. Always restore power and verify each fixture operates correctly before considering the job complete. Test with a dimmer switch if you're using dimmable fixtures to ensure compatibility. Check that fixtures sit flush with the ceiling and that trim rings cover ceiling holes completely. Address any issues immediately while you still have tools out and materials available rather than discovering problems weeks later.
When You Should Call a Professional Instead
DIY installation saves money and provides satisfaction, but certain situations genuinely require professional expertise. Attempting electrical work beyond your skill level creates safety hazards and often results in expensive correction work. Recognizing when to call a licensed electrician demonstrates good judgment, not inadequacy.
Complex new circuit installation almost always warrants professional help. If your lighting project requires running new circuits from your electrical panel, installing new breakers, or working inside your main service panel, hire an electrician. Panel work requires specialized knowledge of service ratings, proper breaker sizing, and complex code requirements. Mistakes at the panel level can damage your entire electrical system or create serious fire hazards.
Homes with aluminum wiring, knob-and-tube wiring, or other outdated electrical systems need professional evaluation before any modifications. These older wiring methods require specific connection techniques and materials that differ from modern copper wiring. An electrician can assess your existing system and make safe connections using proper transition methods and materials. Attempting to work with unfamiliar wiring types without proper knowledge often creates more problems than it solves.
Structural complications like cathedral ceilings, complex truss systems, or limited attic access may require professional installation. Electricians have specialized tools and techniques for working in difficult spaces and can often complete installations in a fraction of the time a DIYer would require. If your ceiling cavity is inaccessible or filled with complicated HVAC ductwork and structural members, professional help usually proves more cost-effective than struggling with inadequate access.
Finally, if your project requires electrical permits in your jurisdiction, consider whether you're comfortable with the inspection process. While many homeowners successfully obtain permits for their own work, the inspection process requires confidence in your installation quality and knowledge of local code requirements. Professional electricians understand inspector expectations and rarely face correction requirements. If you're uncertain about code compliance or uncomfortable with inspection scrutiny, hiring a licensed professional provides peace of mind and ensures your work meets all safety standards.
Why Choose Amico for Your DIY Lighting Project
Selecting the right fixtures makes the difference between a smooth installation experience and frustrating complications. Amico has specifically designed their recessed lighting products with DIY installation in mind, incorporating features that simplify the process while maintaining professional-grade quality and performance.
Every Amico LED fixture arrives as a complete, integrated unit with the LED module and trim built together. This eliminates the multi-step assembly process required by traditional fixtures where you separately install housings, make connections, and then attach trim pieces. You're working with a single, lightweight component that installs in a fraction of the time. The slim profile design, typically just 1-2 inches thick, fits easily in standard ceiling cavities and accommodates even tight spaces where bulky traditional housings won't fit.
Quality components and certifications distinguish Amico fixtures from budget alternatives. All products carry ETL and FCC certifications, confirming they meet rigorous safety and electromagnetic interference standards. The integrated LED modules are rated for 50,000+ hours of operation, meaning your lights will likely outlast your ownership of the home without requiring bulb changes or maintenance. With CRI 80+ color rendering, Amico lights display colors naturally and accurately, important for kitchens, bathrooms, and any space where appearance matters.
Installation-friendly features streamline the DIY process. Pre-attached pigtails with adequate wire length eliminate the awkward work of connecting to wires buried deep in housing boxes. Included push-in wire connectors make electrical connections simple and reliable without requiring connector twisting skills or additional materials. Robust spring clips secure fixtures firmly with just a push, requiring no separate hardware or adjustment. These thoughtful design elements transform what could be a challenging project into a manageable weekend task.
Amico backs every fixture with comprehensive warranties ranging from 2-5 years depending on the product line, demonstrating confidence in their manufacturing quality. If you encounter any defects or performance issues, their 30-day hassle-free return policy and responsive customer support ensure problems get resolved quickly. Free sitewide shipping means you're not paying premium freight costs that can significantly increase project budgets when ordering from other suppliers.
For larger projects or professional contractors, Amico offers a wholesale program with tiered volume discounts. Whether you're lighting a single room or completing a whole-house renovation, you'll receive competitive pricing on quality fixtures that install easily and perform reliably. The combination of DIY-friendly design, professional-grade quality, and value-oriented pricing makes Amico an ideal choice for homeowners tackling their own lighting upgrades.
Installing canless LED recessed lights yourself is absolutely achievable for homeowners with basic electrical knowledge and proper safety practices. The modern canless design has revolutionized what was once a complex, time-consuming project into a straightforward DIY task that can transform your home's lighting in a single weekend. By honestly assessing your skills, following proper safety protocols, using quality fixtures designed for easy installation, and recognizing when professional help is needed, you can successfully complete a lighting upgrade that adds value, functionality, and style to your home.
The key is preparation and realistic expectations. Understand your local code requirements, gather the right tools and materials, plan your layout carefully, and work methodically through each installation step. Don't rush the process or skip safety verifications. When you take your time and follow proper procedures, the results will look professional and function reliably for decades.
With Amico's complete range of canless LED recessed lighting, you're getting fixtures specifically engineered for DIY success. The integrated design, quality components, ETL and FCC certifications, and installation-friendly features take the guesswork out of the process, letting you focus on creating the perfect lighting for your space. Whether you're updating a kitchen, adding ambiance to a living room, or completely refreshing your home's lighting, you now have the knowledge and confidence to tackle the project yourself.
Ready to Start Your DIY Lighting Project?
Explore Amico's complete selection of DIY-friendly canless LED recessed lights, backed by ETL & FCC certifications, 50,000+ hour lifespans, and hassle-free installation. Free shipping on all orders.
Shop Recessed LightingRequest Wholesale Quote


